An Alfred Workflow for Obsidian
#post #productivity
This post originally appeared on Blog 2.0
An Alfred workflow for Obsidian that fits my need.
GitHub repository: Obsidian Alfred Workflow Template
H2 Motivation
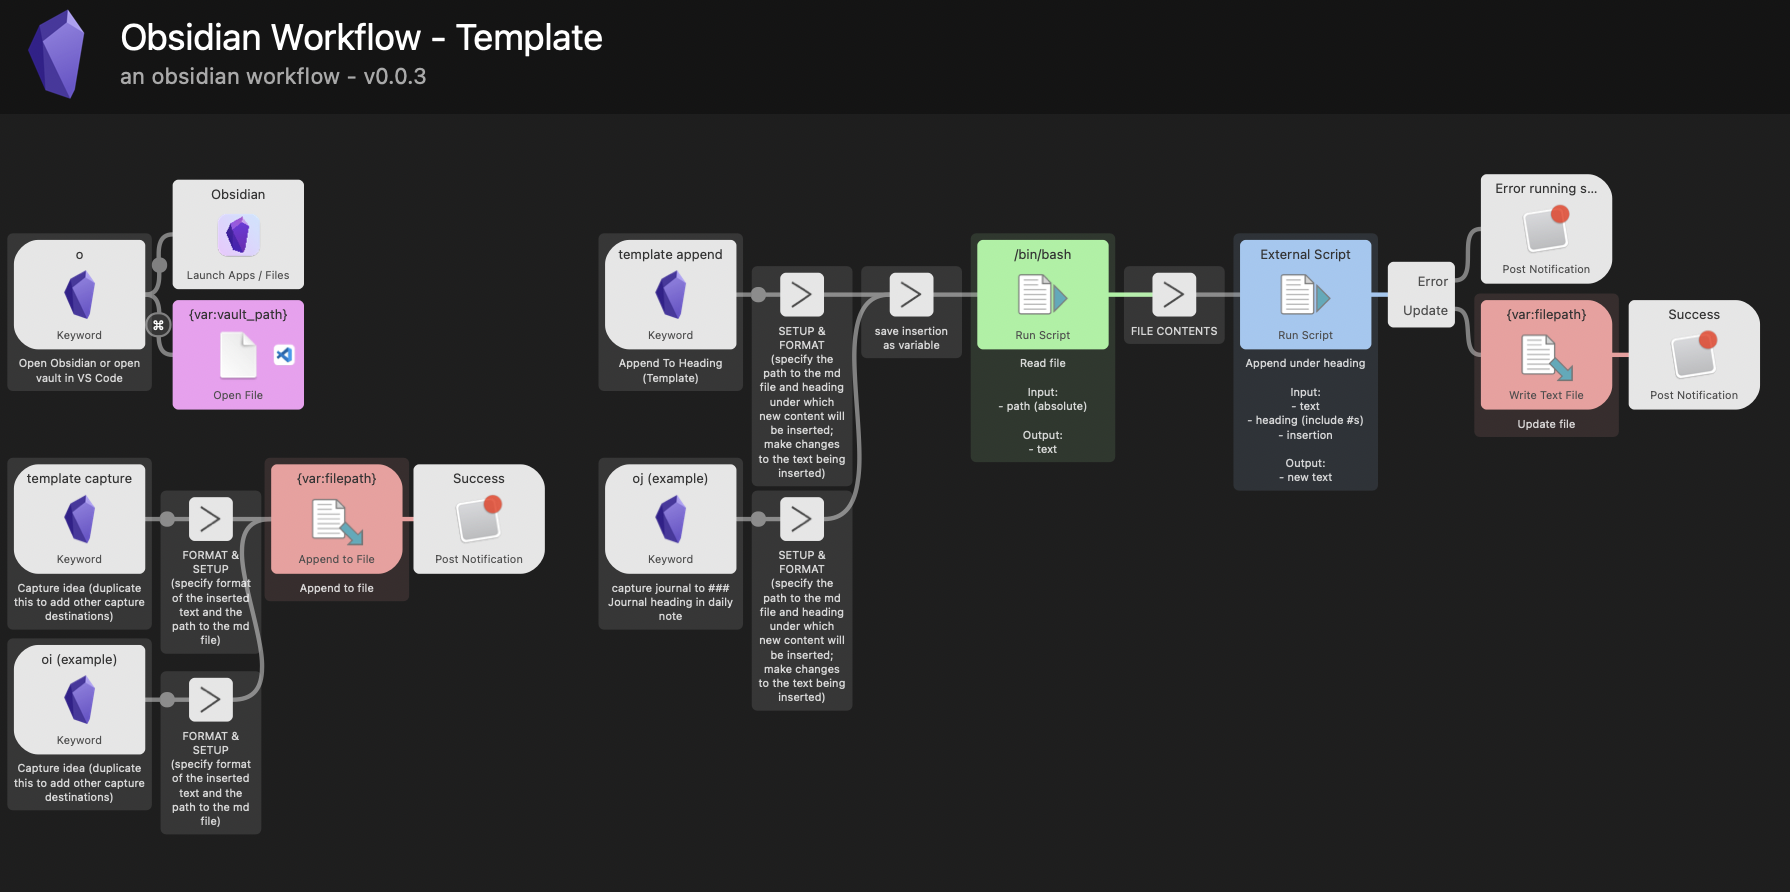
Automation helps to reduce friction in workflows. Alfred provides a sandbox environment for building highly-customisable workflows. There are already workflows for obsidians out on GitHub like obsidian-utilities and obsidian-alfred. However, I personally find them a bit overcomplicated, so I decided to create my own with simplicity and expandability in mind.
H2 Features
An overview of what this workflow does:
oto open your vaulto+⌘⏎to open vault in VSCode (or your preferred editor)- Any number of capture actions that appends something to a note, with a customisable template. For example:
oito append an idea to an idea inbox and adds a timestamposto append an item to a shopping list and adds a- [ ]checkbox in front of it
- Any number of capture actions that appends something to a heading in a note, with a customisable template. For example:
ojto add a journal entry with a timestamp and the tag#journalunder the### Journalheading in today’s noteotto add a task under the### Inboxheading in today’s note
H2 How it works
Opening the vault is pretty straightforward with Alfred’s built-in Launch Apps and Open File actions.
Append is also done using Alfred’s built-in Write Text File action.
The append to heading feature is based on obsidian-utilities but with a script modified to be more customisable. Basically, the workflow reads a file, pass the text content to a python script that adds an insertion under a particular heading using regex, and write the new content to file. The script:
#!/usr/bin/python3

import re, sys, os, unicodedata

text = os.environ['text']
heading = os.environ['heading']
insertion = os.environ['insertion']

sys.stderr.write(f"text: {text}\n")
sys.stderr.write(f"heading: {heading}\n")
sys.stderr.write(f"insertion: {insertion}\n")

find = re.compile(r'(?<=' + heading + r'\n)((\n.*?)+)(?=#+ |$)', flags = re.MULTILINE|re.DOTALL)
found = re.findall(find, text)
sys.stderr.write(f"found: {found}\n")
replace = f'\\1{insertion}'

if re.findall(find, text) == []:
	new_content = text + heading + '\n\n' + insertion
else:
	new_content = re.sub(find, replace, text)

sys.stdout.write(unicodedata.normalize("NFC",new_content))
H2 How to use
Backup your vault first!
There might be untested edge cases that would cause the script to break something. The last thing you want is to lose your work.
H6 1. Specify the vault path in the workflow’s environmental variables

H6 2. Create capture and append actions keywords by duplicating the capture template
Duplicating the first two nodes are sufficient. Specify the keyword in the Keyword node and add a description.
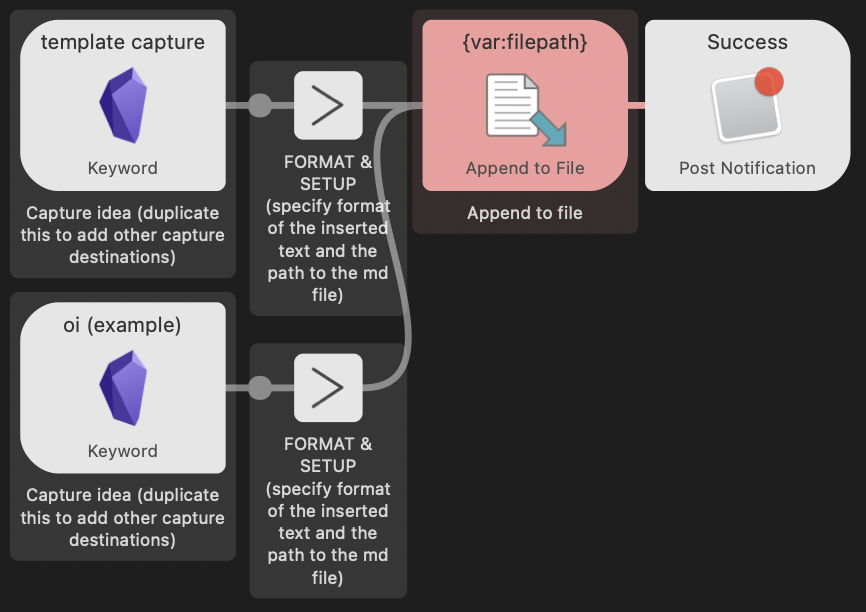
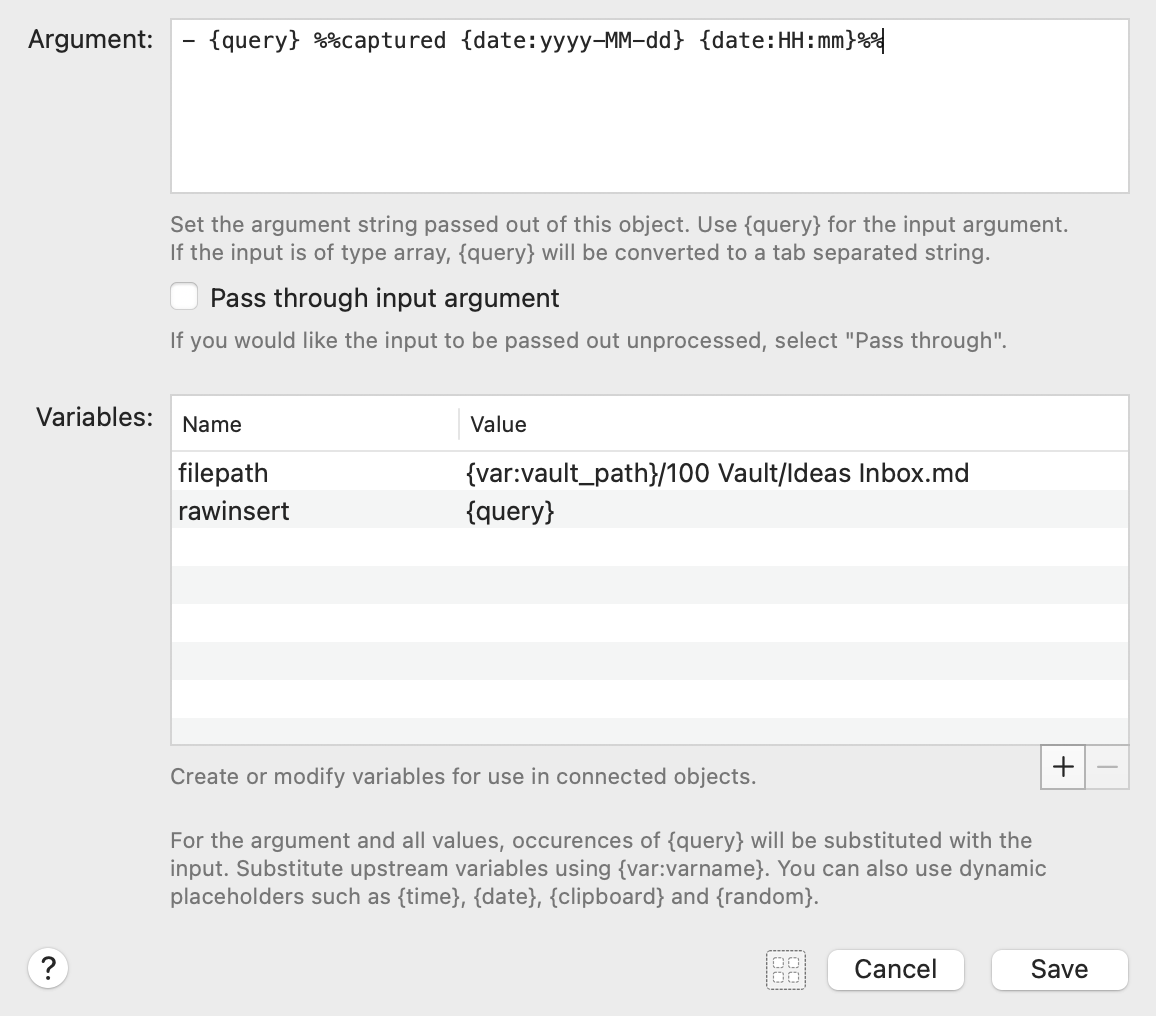
Configure the insertion action using the FORMAT & SETUP node.
- Use the Argument field to format the inserted content. A timestamp can be created this way.
- The
filepathvariable needs to be the path to your markdown file
Example:
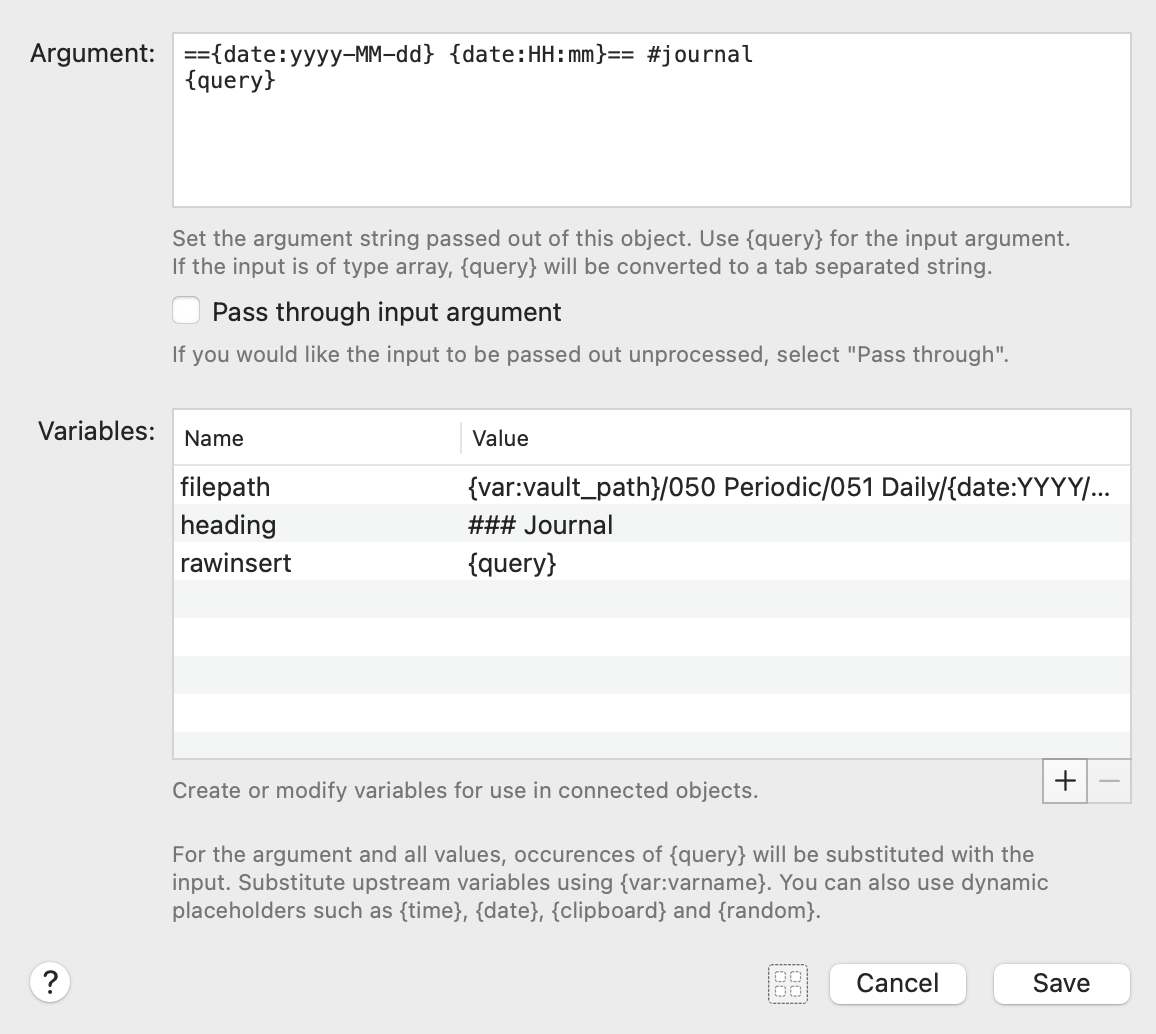
H6 3. Set up append under heading
We do the same thing of duplicating the first two nodes and connecting them all to the third node in the template sequence. Once again, specify the keyword.
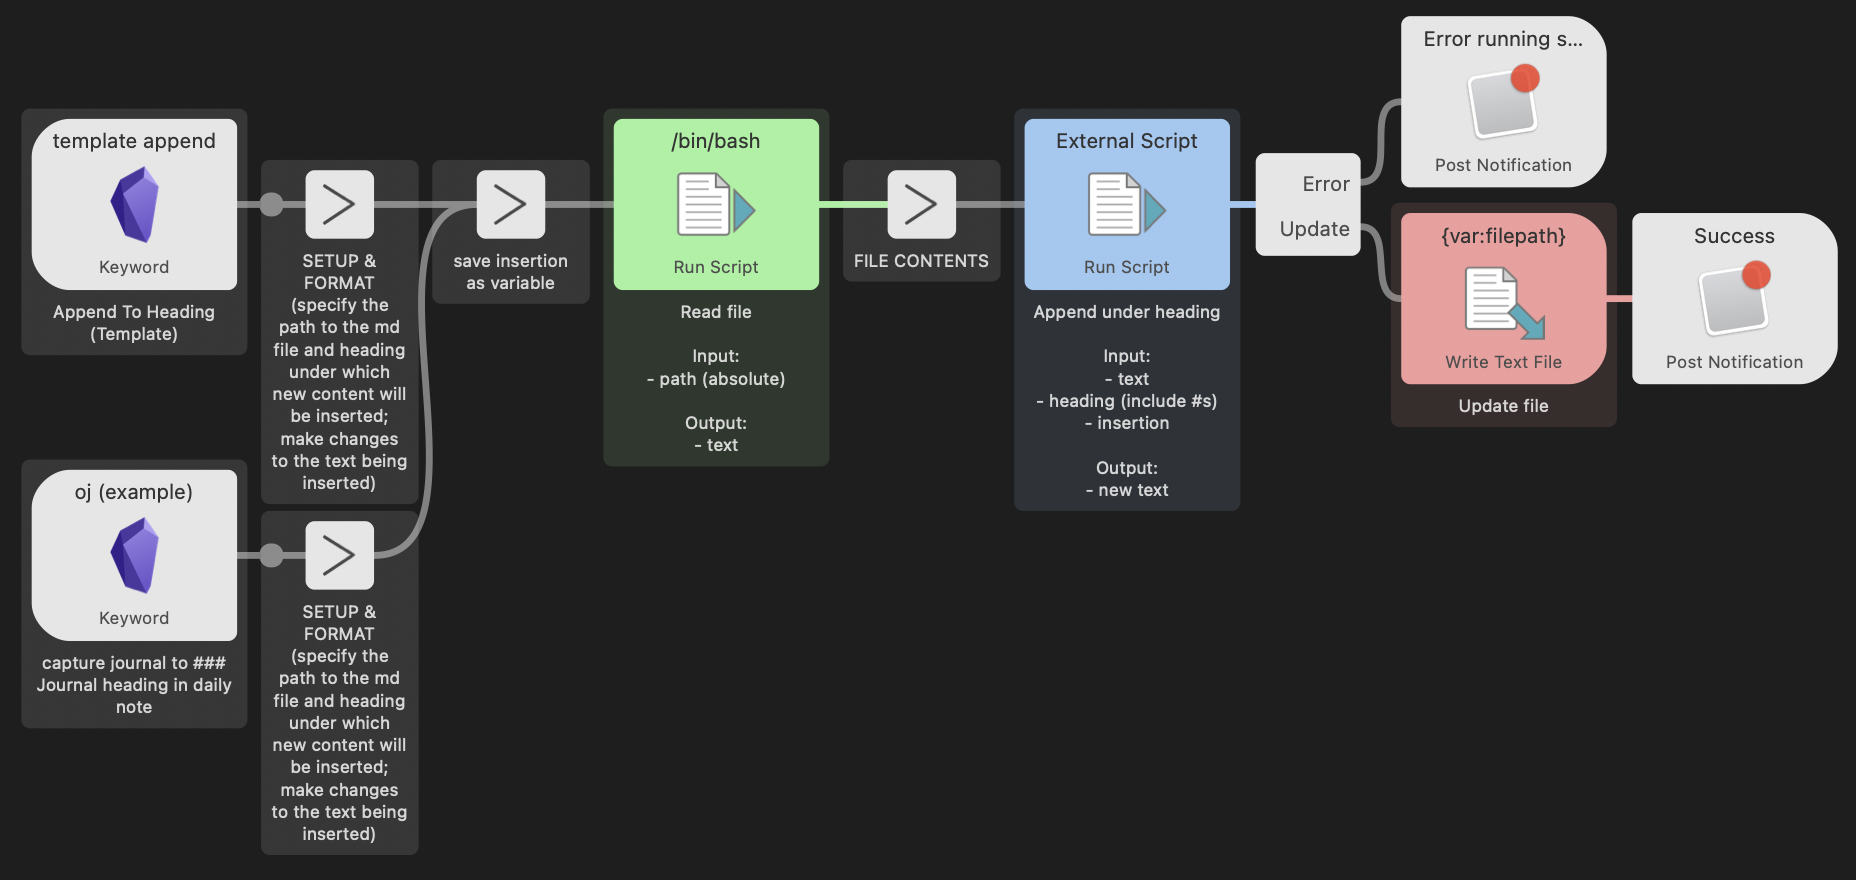
The FORMAT & SETUP node needs a slightly different setup:
- Format the inserted content in the Argument field
- Set the
filepathvariable to the path to your markdown file - Set the
headingvariable to the heading under which the insertion takes place. Include the octothorpes.
That’s it. Enjoy :).